Creating Work Factors Risk Assessment
Login to your FlourishDx admin dashboard and navigate to Surveys > Risk Assessment.
Click Create New Survey.
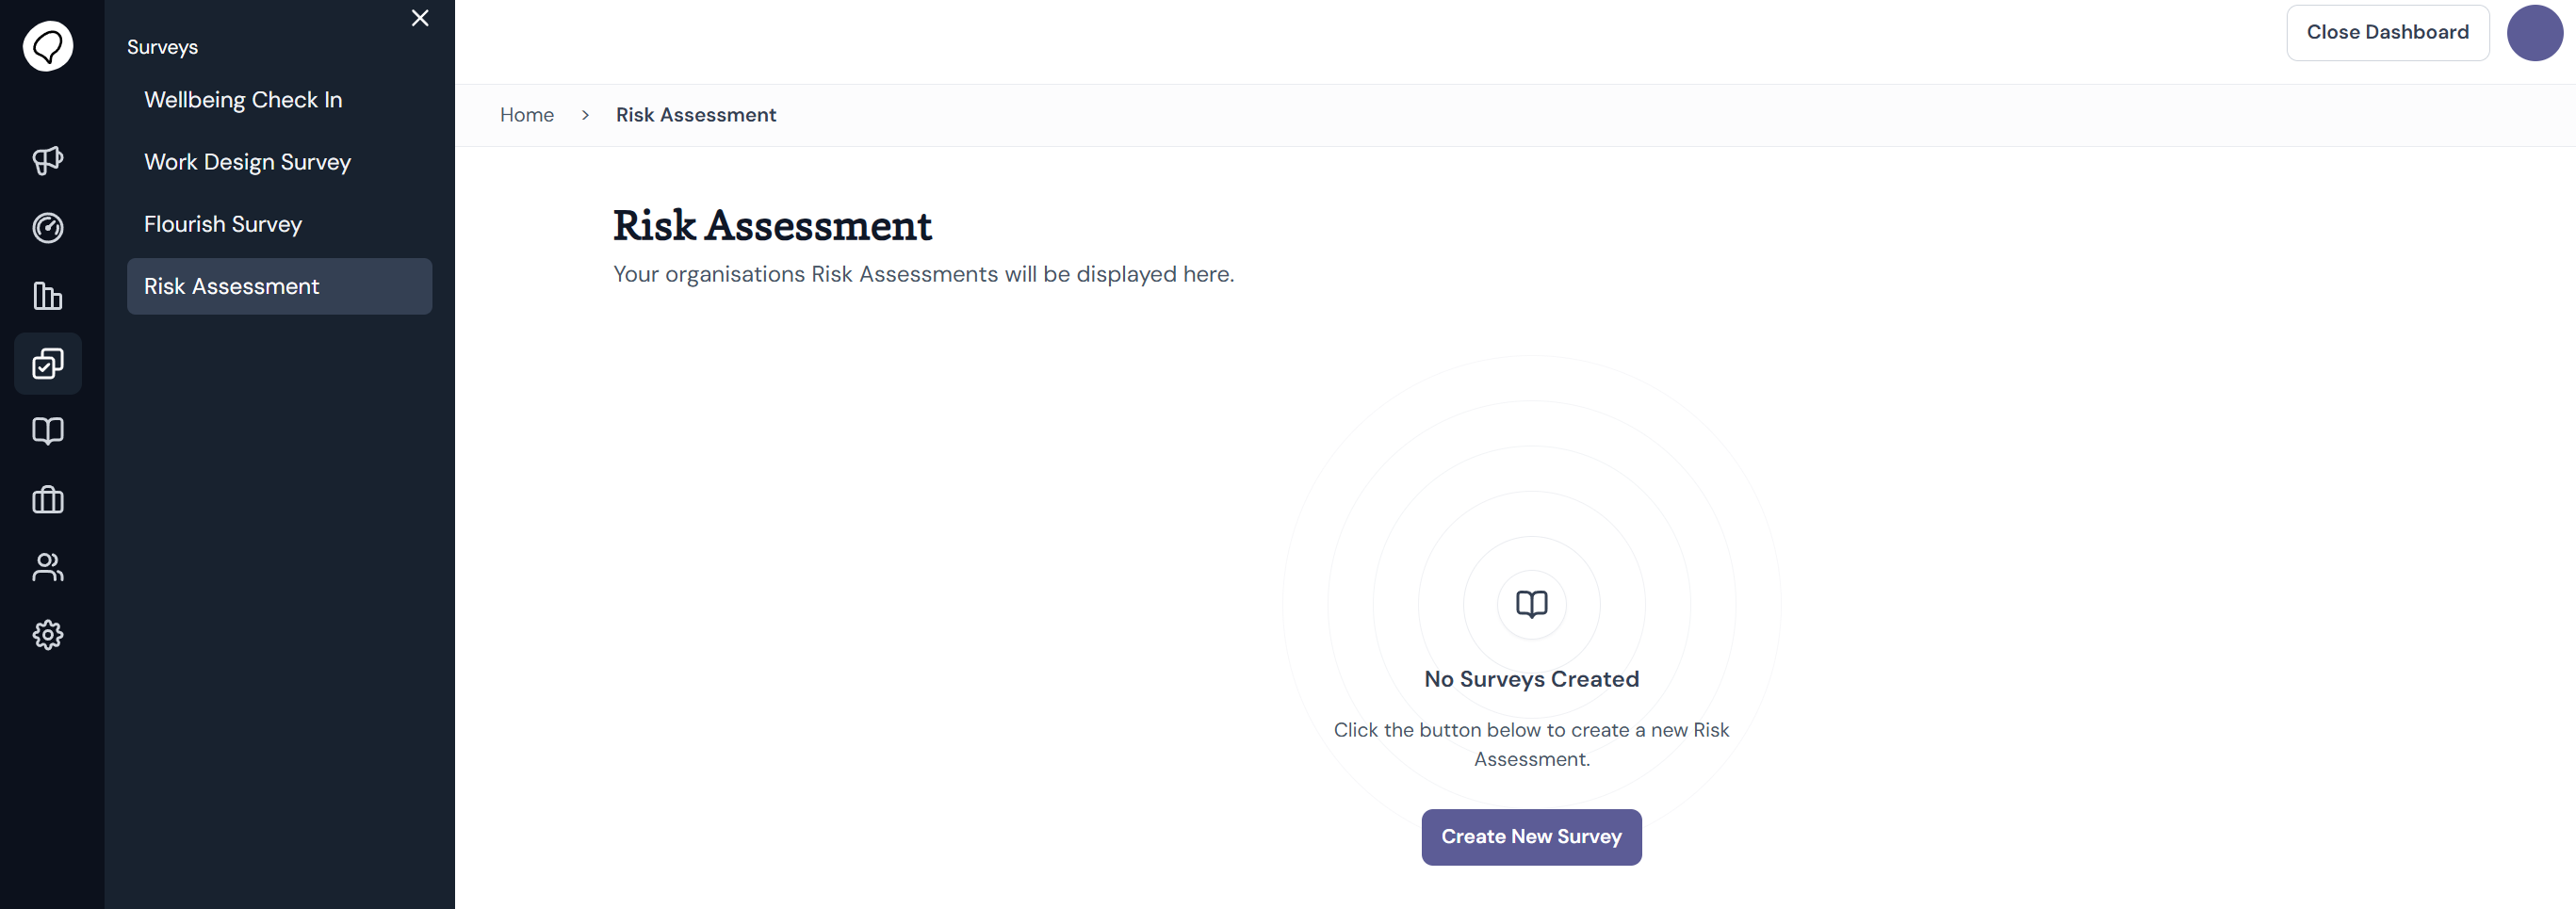
This will open a new screen with four steps to create your new survey.
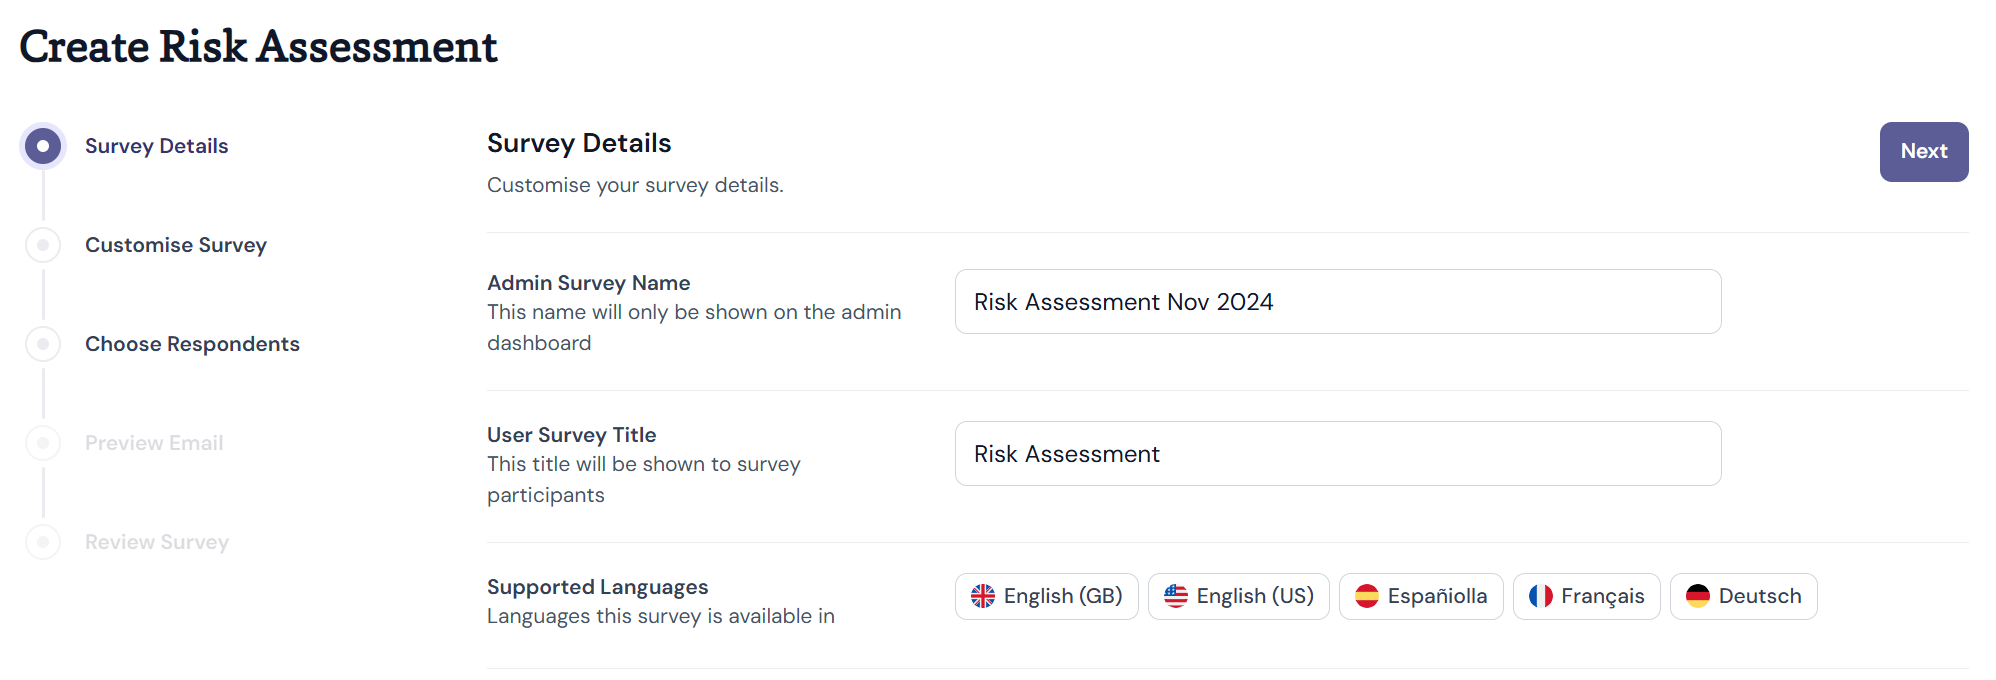
Step 1 - Survey Details
Input an Admin Survey Name. This will be only seen by those with access to the admin dashboard. Your title should be worded so that it can be distinguished from other surveys as they populate in the dashboard over time.
Input a User Survey Title. This will be shown to users when completing the survey.
Click Next.
Step 2 - Customise Survey
This step is where you choose which questions to include in your risk assessment.
Step 2a - Wellbeing Check In
If you want to include our Wellbeing Check In at the beginning of your risk assessment, click the toggle on to Wellbeing Check In Enabled.

Step 2b - Work Factors
Some Work Factors will be selected by default to be included in your risk assessment. For guidance on work factors selection, see How do I decide what factors to include in my FlourishDx work factors risk assessment?
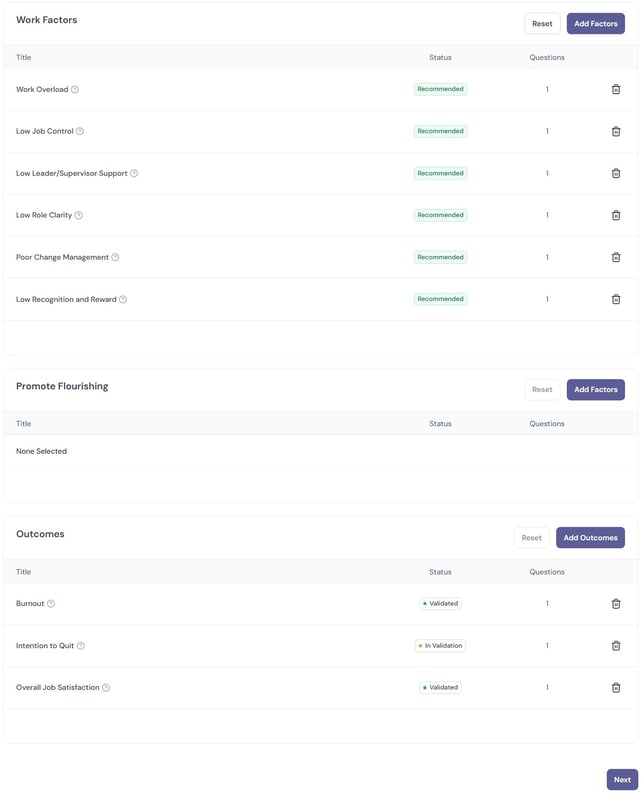
To remove a factor click the bin button on the right.
To add more click Add Factors at the top of the table. This will open a sidebar with a list of all work factors.
Search for the factor you want and check the box to add it to your survey. 
Close the sidebar to continue.
To view the definition of a work factor, click the question mark next to the work factor name.
Step 2c - Promote Flourishing Measures
The Promote Flourishing table provides the option to include questions about the positive aspects of work within your survey. There will be none selected by default in this table.
To add a measure follow the steps from 2b.
Step 2d - Outcome Measures
Some Outcome Measures will be selected by default. To view the definition of an outcome measure, click the question mark next to the outcome name. This will provide a definition of the outcome and the associated questions.
To add a measure follow the steps from 2b.
Once you are happy with your survey questions, click Next.
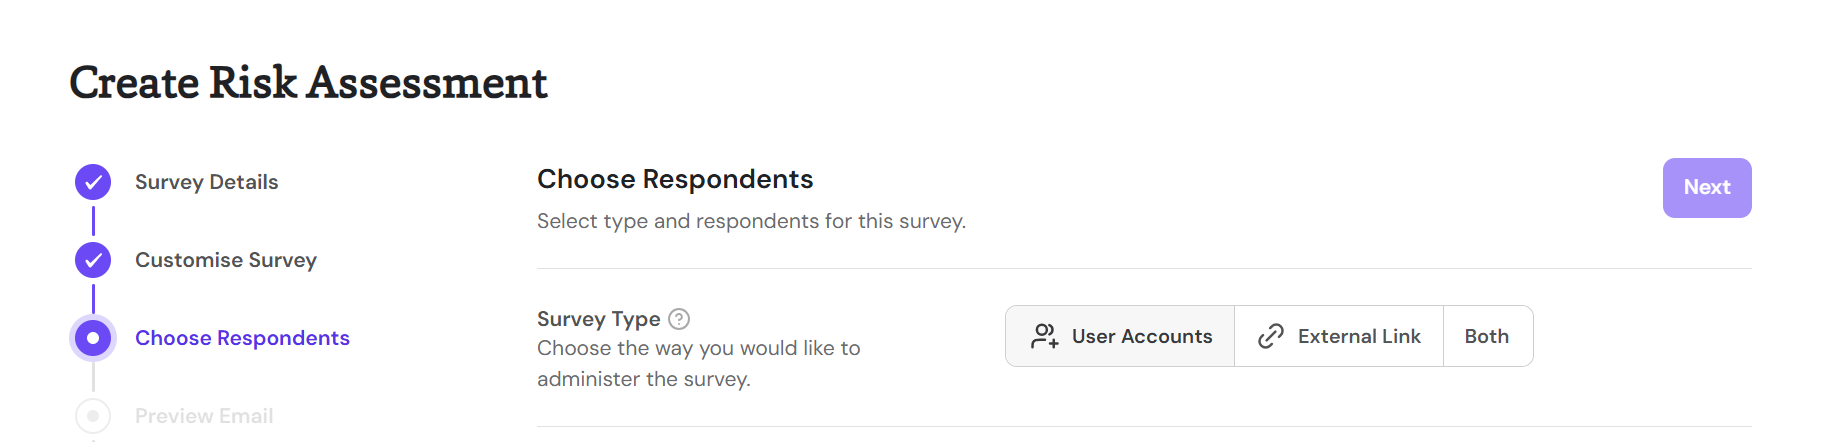
Step 3 - Survey Type
FlourishDx provides two methods of administration - via user accounts or via external link.
The User Accounts option will allow you to target FlourishDx account holders. Users will receive a notification of the survey request. It restricts the survey to one response per account. It can save time as users do not need to enter profile information already on file.
The External Link option will generate a unique URL to be circulated to respondents using your own communication channels. There is no way to track completion or restrict who completes the survey. Users will be asked demographic information at the beginning of the survey for data segregation later. This option can be useful for deskless workforces, or where respondents do not have a company-affiliated email address.
The Both option will combine the two delivery methods, allowing you to both push the survey to FlourishDx account holders and to create a unique URL for use by non-account holders. This option works well for organisations with a combination of office-based and field-based workers, where some respondents will use a computer regularly and others do not have easy access to a work computer.
Step 3a - (User Accounts) Choose Respondents
When you choose a User Accounts survey you will see a table with of all of the users in your organisation or, for line managers, the users to whom you have permission to send surveys. To select all users, simply check the box at the top left of the table. Otherwise, you can apply filters or use Search Users to select particular respondents.

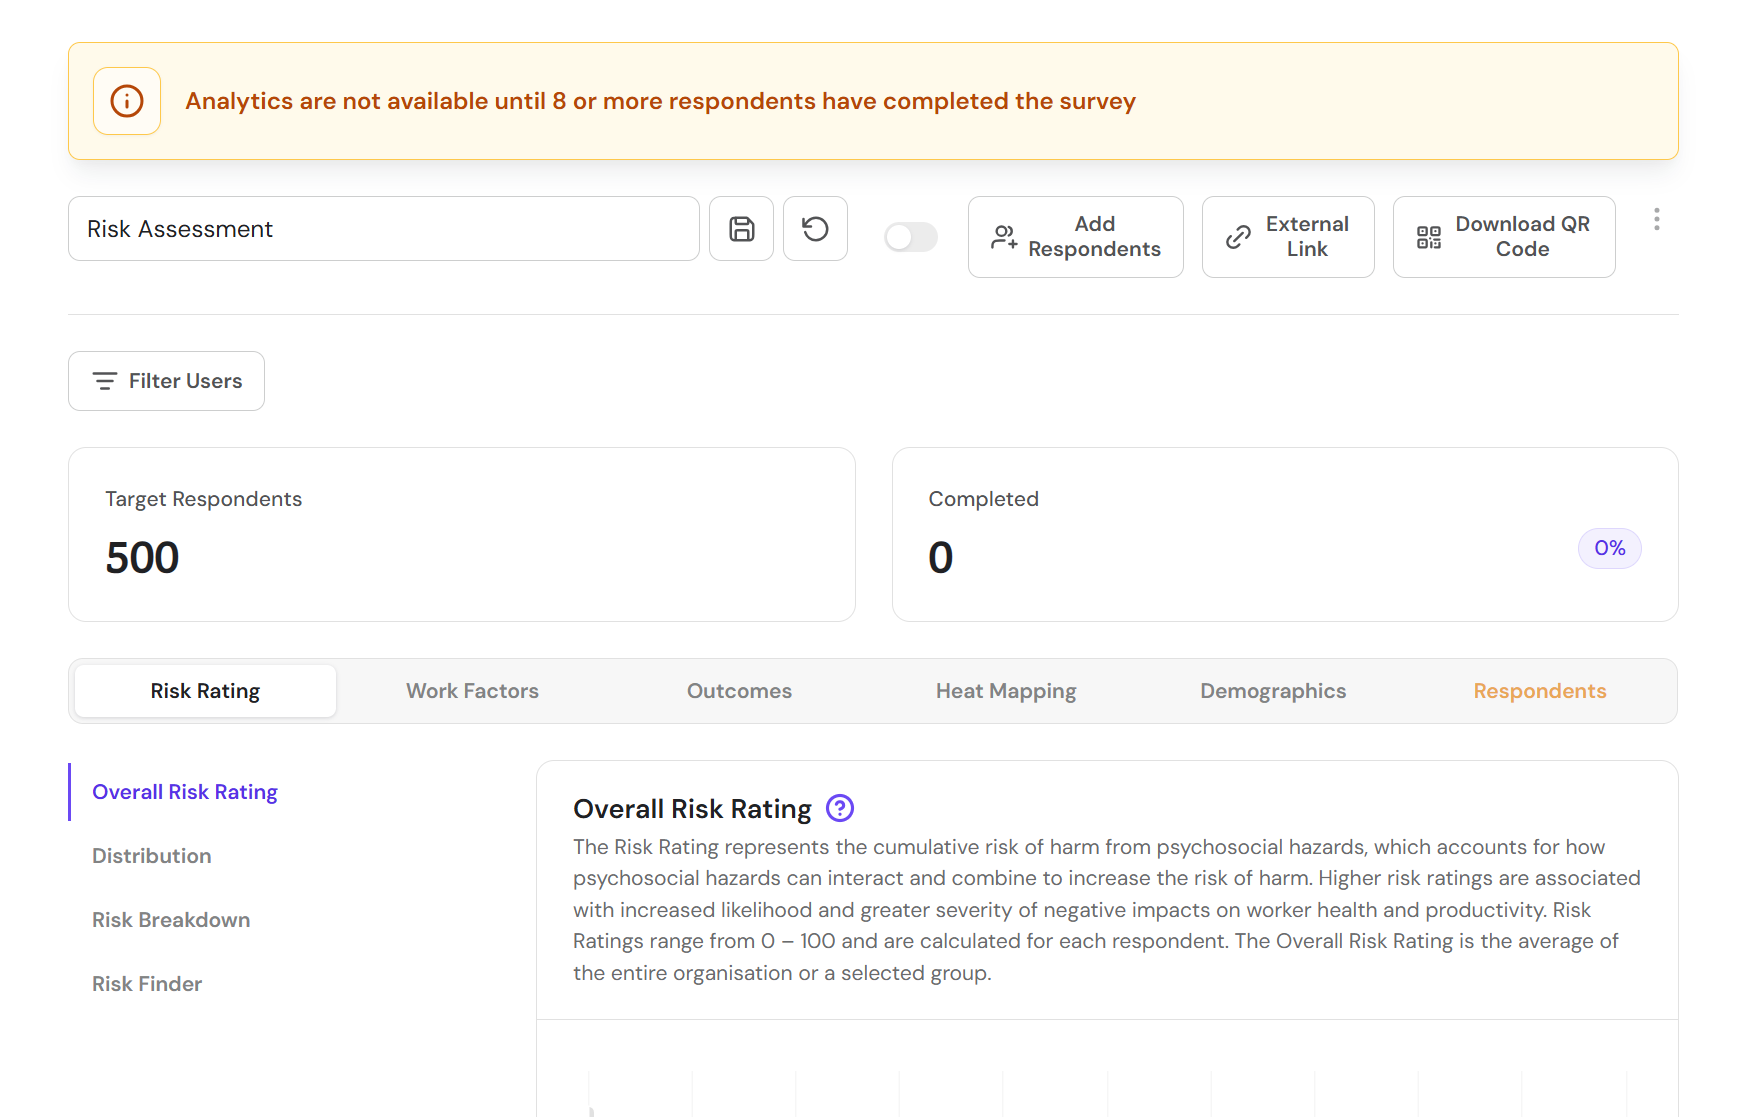
You must choose at least eight respondents if you want to view survey results.
The automated dashboard will only populate once eight responses have been received, so ensure your surveys have at least eight respondents if you want to use the analytics capabilities of FlourishDx.
Once you have selected your respondents, click Next.
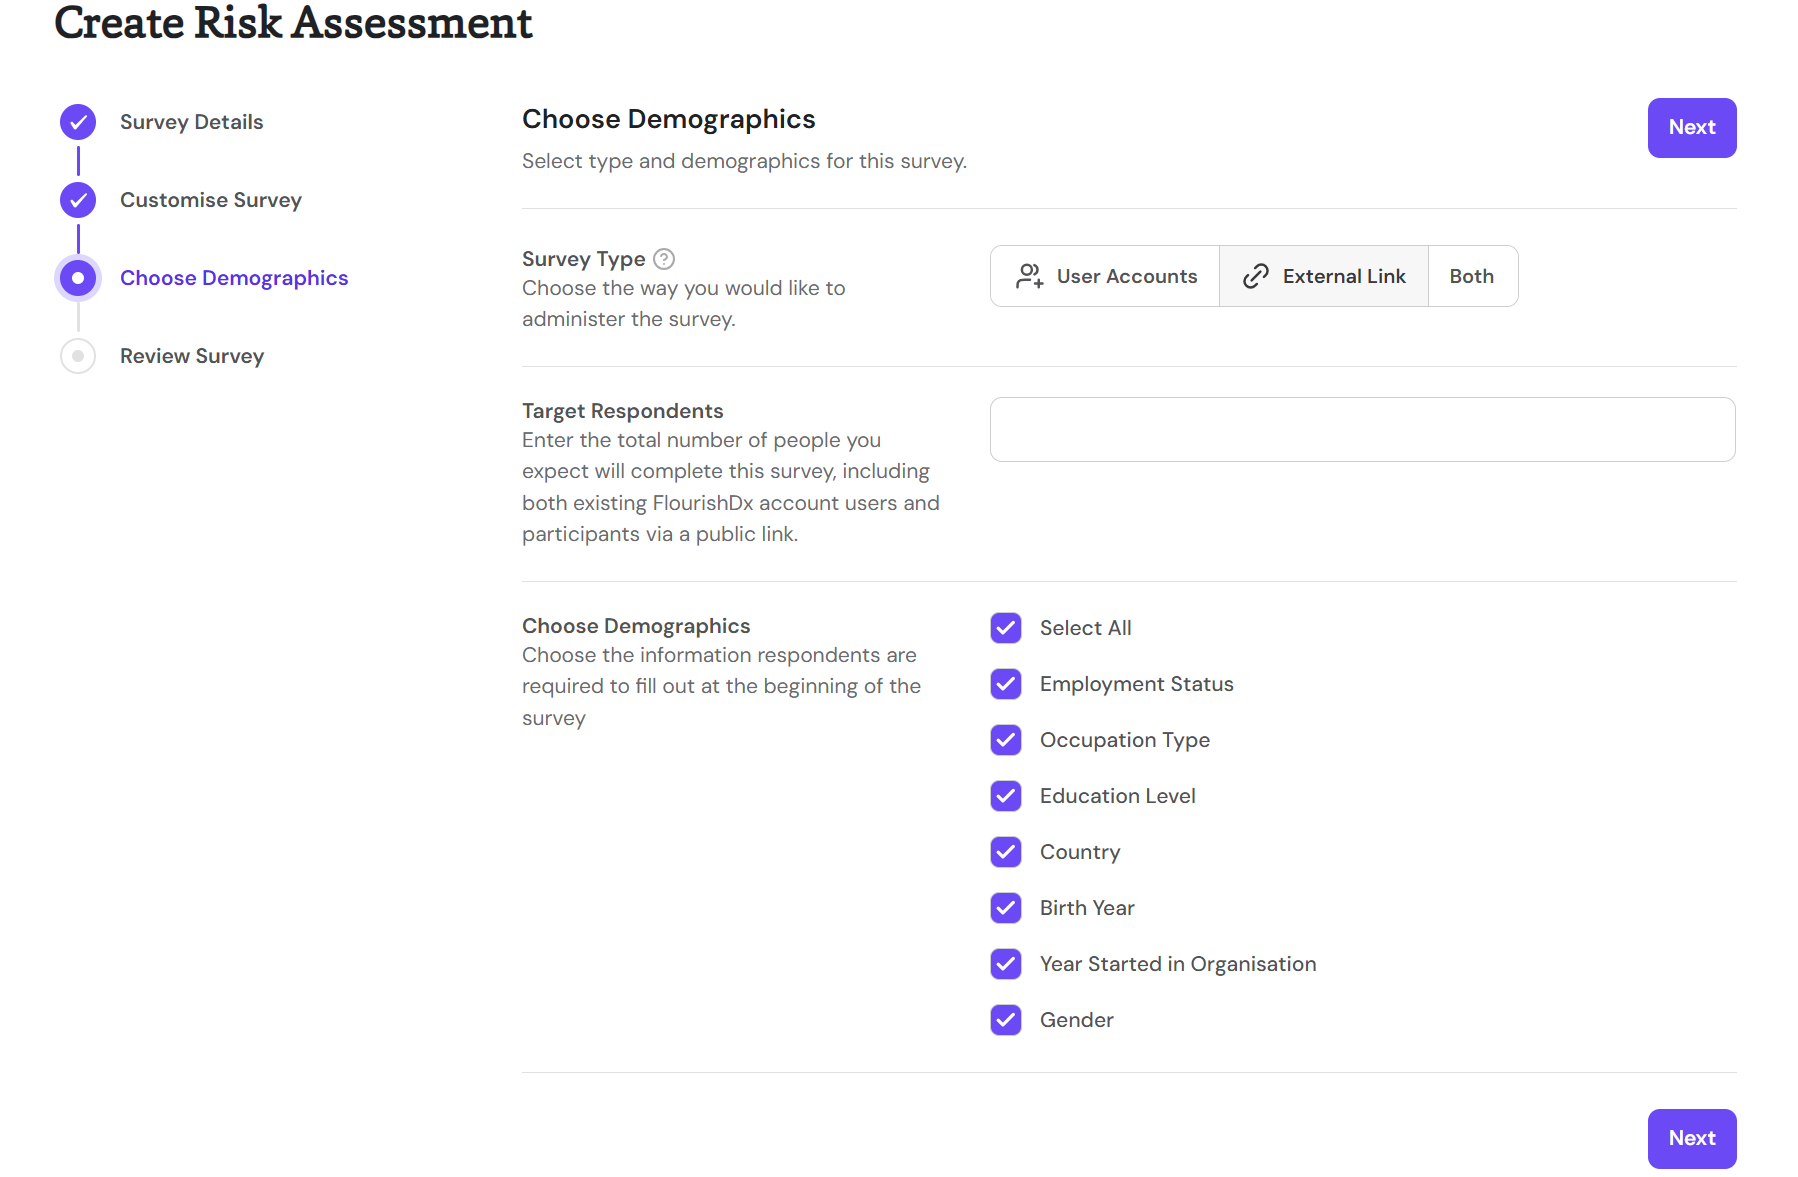
Step 3b - (External Link) Choose Demographics
When you choose an External Link survey you will see the list of demographic fields available to include in your survey. Tick the box next to a field name to include it in your survey. Users will be prompted to fill out these demographics at the start of the survey.
The Target Respondents option allows you to specify the number of people you expect to complete the survey. This number will be used by your results dashboard to display a response rate for the survey.
Once you have selected your demographics, click Next.
Step 3c - (Both) Choose Respondents
When you choose a Both survey you will see the Target Respondents box and the user selection table. All demographic options are automatically included in a Both survey.
To select users, follow the steps from 3a.
Once you have selected users and specified your target response number, click Next.
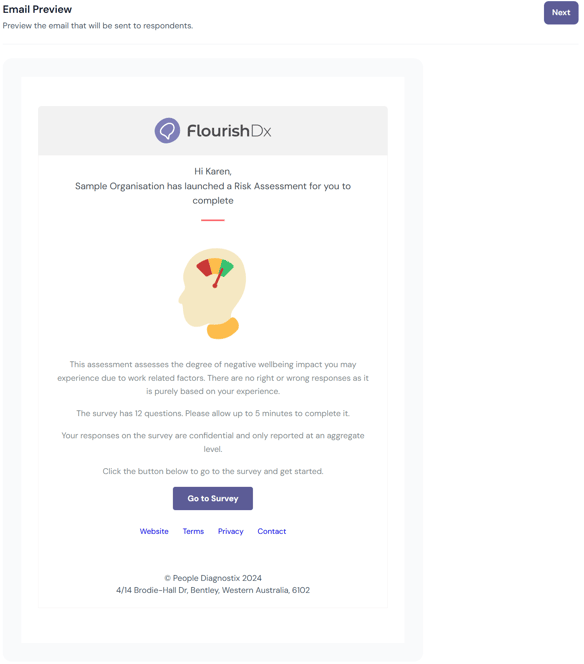
Step 4 - (User Accounts) Email Preview
This screen provides a preview of the email that will be sent to all respondents.
Step 5 - Review Survey
The final screen has a summary of the survey you are about to create. When you are happy to proceed, click Create Survey.
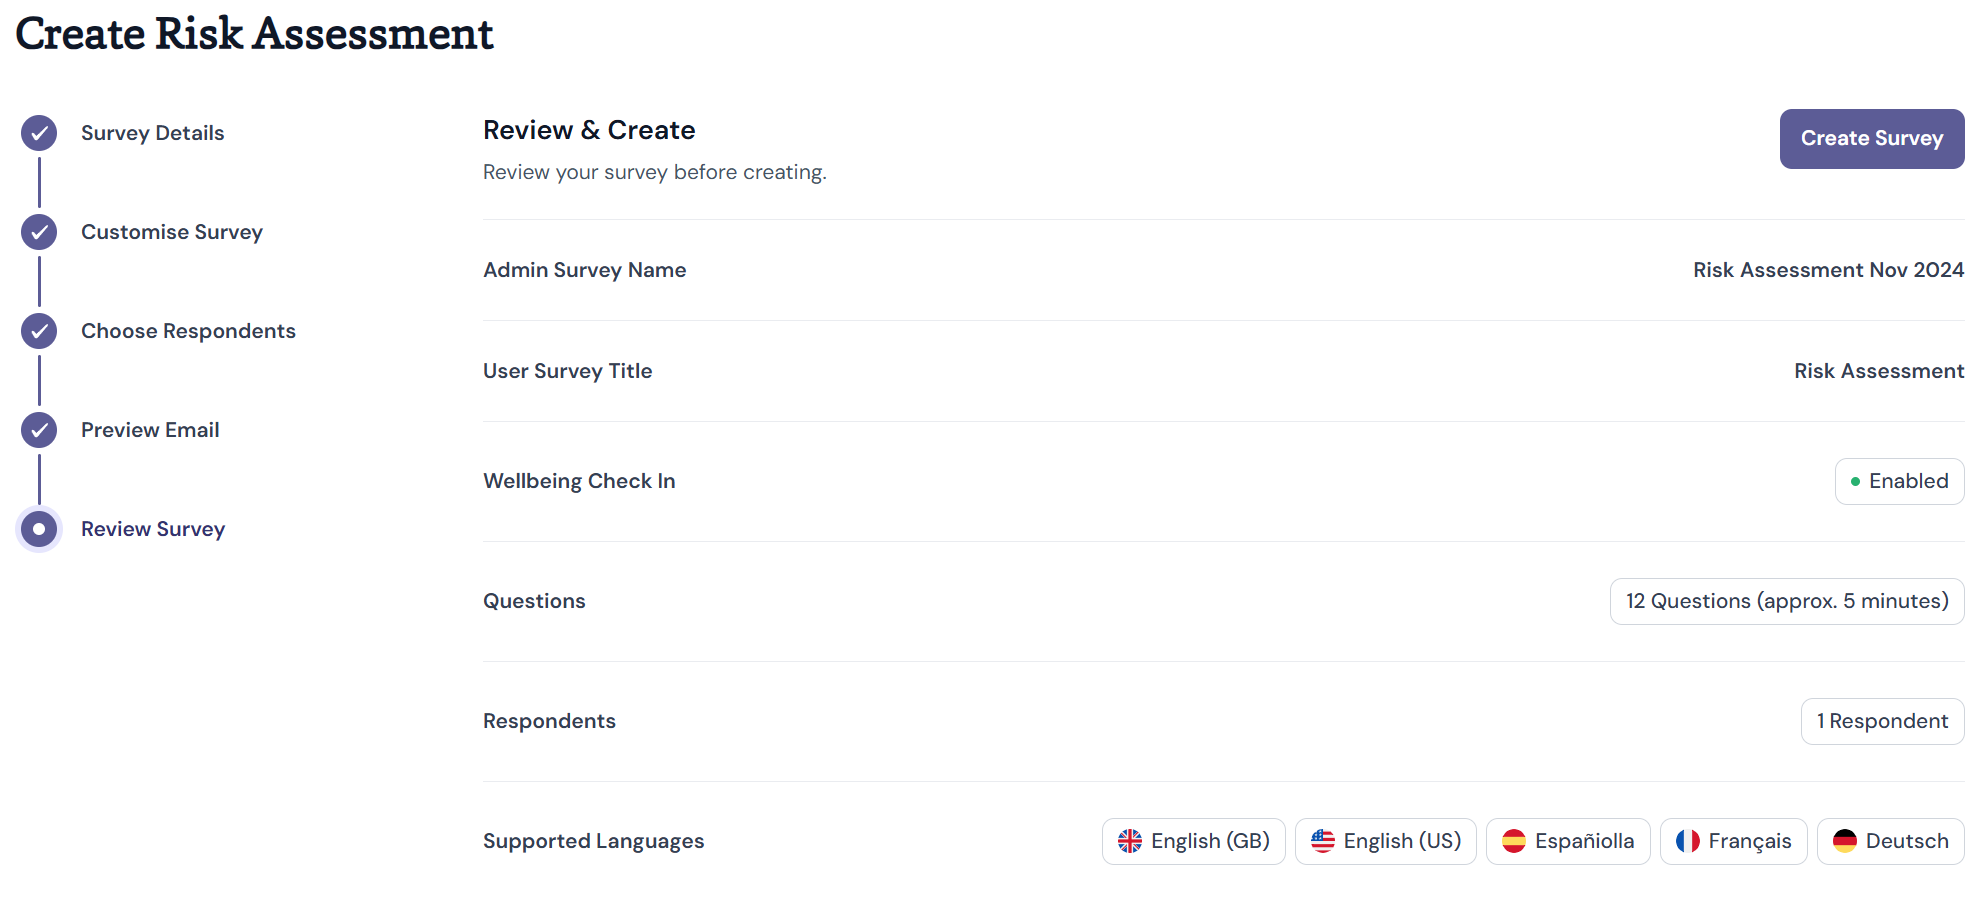
This will send an email notification to all respondents, as shown in the Email Preview, and generate the survey dashboard, where results will populate once 8 responses have been received.
If you have selected an External Link or Both survey, the survey dashboard will create the survey URL and associated QR code. Click on External Link to copy the hyperlink to your clipboard, or Download QR Code to download a copy of the QR Code for use in posters and other communications materials.